


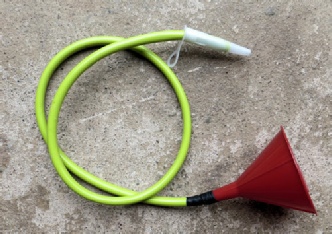
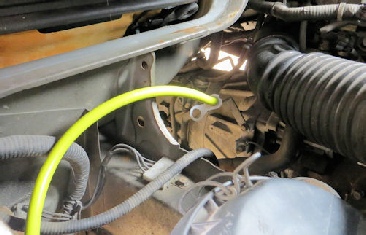
The Automatic gearbox on my Mazda Bongo doesn’t have a drain plug, so I sucked out the ATF fluid using a Pela 6 litre pump with the extractor tube inserted into the dipstick tube under the driver’s seat. It’s a slow job, but with a bit of patience and periodic re-
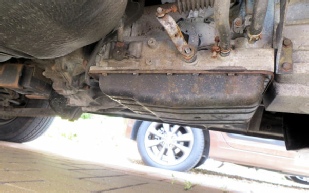
It seemed like a good idea to clean out the sump while the box was empty of fluid. It’s quite a stretch to reach the sump-
I completely removed all but the 4 corner bolts as I didn’t want the sump to drop and possibly bend its mating surface. It’s quite a long way to the ground and so I positioned something (a plastic washing up bowl) near to the sump so that, when free, it could be lowered just a short distance.
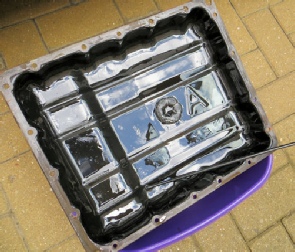
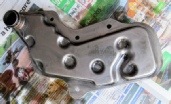
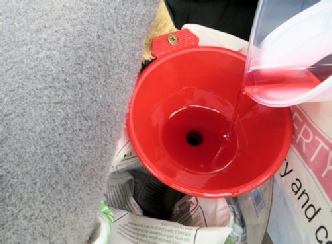
I also used strong spring clips to hold it in place while I removed the final 4 bolts. This made it easier to control the release without straining the sump edges. It’s worth noting that I didn’t have to do anything to break the seal. The sump separated under its own weight. You can see how dirty it was (right) -
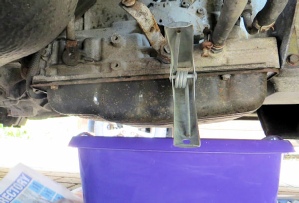
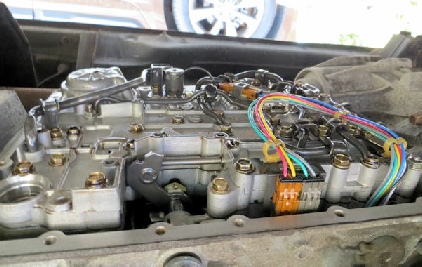
The underside of the box with the sump removed is shown on the left. There’s a mesh filter, held in place with 4x 10mm bolts, that I removed and cleaned with petrol. (The box view is minus this filter, which fits in the hole bottom left of the photo.)

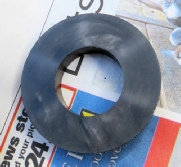
I cleaned up the inside of the sump with old newspaper and also carefully cleaned up the mating surface. I smeared a very fine coating of sealant and clamped the sump back in place with the spring clips prior to inserting the 18 bolts. The procedure was the reverse of the removal. 4 corner bolts first and then the other bolts loosely. Don’t screw any bolts tight until they’ve all been engaged and screwed in slightly so that you know they can all be located. Then I started tightening bolts at the centre of each side first, working towards the sump corners last.. The spring clips can be re-
Then the gearbox was re-
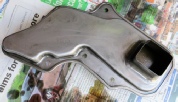
Top and bottom of this filter are shown on the left after cleaning, along with the muck flushed out of the filter into the bowl, and the cleaned magnet.
